Learn how to make basic text edits and upload or change images directly on your site.
Once you have logged in to your site, you will see several different icons. Click on a pencil icon or a camera icon to get started.
The Pencil Icon
The Inline Editing Toolbar
Inline editing means you can type and edit content right on the page instead of having to use a separate form or window. For best results, we recommend composing your site's content in a word processing document (like MS Word) and then pasting it into the site.
Select the pencil icon to open the inline editing toolbar. A text box will also appear.
You can now type and edit your text in the box (or paste content in) as you would with any word processing document.
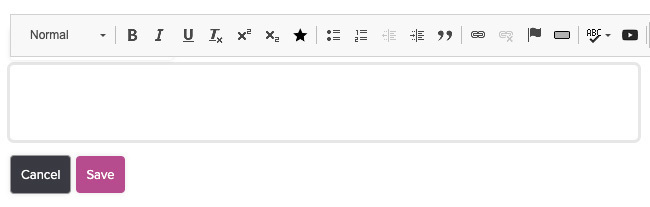
The toolbar allows you to:
BE CAREFUL! If you are editing directly on the site, be sure to “Save” your work before you exit the page.


DID YOU KNOW? The erase tool ![]() in the editing tool bar removes the formatting of the text you are pasting in. It's an important feature if you are copying and pasting text from another document.
in the editing tool bar removes the formatting of the text you are pasting in. It's an important feature if you are copying and pasting text from another document.
Learn how to upload images to your website and create an image library.
Images are easy to add, delete or rearrange. Find a spot on the site where you want to add or change a photo. Click on the “Images” toolbar in that spot, and a sidebar will open. The PeopleCMS system will upload image files for you, resize them, optimize them for web viewing, and add them to your page.
The Camera Icon
Browsing the Library
Uploading an Image
Changing the Order
Removing an image
IMAGE PRESENTATION...
You have several options for presenting images on your site.
- The slideshow is a dynamic gallery with choices for sliders and arrows. This option is perfect for showcasing events or products.
- Use the grid and masonry options if you want to present photos in a static “gallery wall” style.
- You can reorder images in any display by using the sidebar. Click on the “Photos” button to get to the sidebar. Then “drag and drop” the images until you have the desired order.
COOL IDEA: Stack your images vertically in any column for a “photo booth” look. To do this, just add multiple images to a single column.
DID YOU KNOW? Unlike with text edits, when you change images, you have to refresh the main website page to see these changes take effect. The blue DONE button at the bottom of the sidebar refreshes the site.
Learn how to add attachments such as articles and PDF documents to your site.
You can add attachments to your site using the Attachments button or by creating a link.
Using the Attachments button

Browsing the Library
Adding a New Document
When there is no Attachment button and you'd like to create a link :
COOL IDEA: If you want a fancier look for your attachment, use the Simple Button tool to add a button in place of a text link.
DID YOU KNOW? You can upload images and attachments and access libraries anytime via the main Settings tab (often found at the top of your site.)
Learn how to add links to text.
Click on the pencil beside the text you want to edit. To make a link, select the text which you would like to be clickable. With that text highlighted, click on the icon in the editing toolbar that has a picture of a chain link.
In the popup window, enter the url of the page you'd like the link to point at. You'll enter it in the field labeled “URL.”
Opening in a New Window
If you are linking to a page on an external website and you want the link to open in a new window for the visitor (so they don't leave your site), you can do this extra step:
Linking to an email address
Learn how to add video files to your site.
Embedding a Video
DID YOU KNOW? You can add video to your site by embedding it or by using a video block.
The Easy Update Tools let you edit content (text and images) in the same spot on the site where your visitors see it. When in doubt about how to change something, go to the place the content lives.